Author Archives: user

2022 Ford E-450 Cabin Air Filter Replacement Guide

Why change your air filter?

It is important to change the cabin air filter of your 2022 Ford E-450 for several reasons:

  • Cleaner air quality inside the car: The cabin air filter helps to remove pollutants, dust, and other allergens from the air inside the car, which improves the air quality for the passengers.
  • Better engine performance: A clean air filter allows for a sufficient amount of air to reach the engine, which enhances overall performance and fuel efficiency.
  • Protecting the engine: A dirty or clogged air filter can restrict the airflow to the engine, which can damage the engine over time.
  • Improving the air quality outside the car: A clean air filter improves the air quality outside the car by reducing the emissions of pollutants.
  • Prolonging the life of the HVAC system: The cabin air filter also helps to keep the heating and air conditioning system running smoothly, which helps prolong the life of the system.

If you replace your air filter on a regular basis, you can ensure that your Ford E-450 engine and HVAC system are running efficiently, and that the air inside and outside the car is clean and healthy.

The correct cabin air filter on a 2022 Ford E-450

For any 2022 Ford E-450, you can use WIX WP10266 cabin air filters. These will be an exact fit and will match the required specifications of your E-450. We always try to recommend the best possible air filters for the money, and these air filters are either a factory recommendation or an equivalent replacement available in today’s market at an affordable price.

How often should I change my cabin air filter?

Generally, it is recommended to replace the cabin air filter once per year, or every 12,500 miles, whichever comes first. If you drive in a heavily polluted area, or in an area with high levels of dust, pollen, or other allergens, it may be necessary to change the filter more frequently. Similarly, if you frequently drive on dirt or gravel roads, or if you use your 2022 Ford E-450 for off-roading, the filter may need to be changed more often.

It’s also important to pay attention to the signs that the filter needs to be changed, including:

  • Increased dust and debris inside the cabin
  • Unusual smells coming from the vents
  • Reduced airflow from the vents

Changing the cabin air filter on a 2022 Ford E-450

This is a process you can do on your own with some standard tools. Of course, consult your owner’s manual, as well as a factory service manual. The video shown below does a good job of outlining the process.

Tips for changing the cabin air filter on a 2022 Ford E-450

Please make sure you watch the video above before you attempt to replace the air filter on your 2022 Ford E-450, as well as review your factory service manual. Additionally, we have some tips below here to help you as you perform this repair.

  • Clean the area around the filter: Before installing the new filter, use a vacuum cleaner or compressed air to clean the area around the filter. This will help prevent debris from obstructing the new filter.
  • Orient the filter correctly: Make sure the new filter is installed securely, with the arrows on the filter pointing in the direction of the airflow. Incorrect installation can lead to reduced filter performance or even damage to your car’s ventilation system.
  • Follow manufacturer’s recommendations: Follow any specific instructions provided by the manufacturer, such as replacing any clips or fasteners, to ensure the proper fit of the new filter.

Helpful Tools

You should be able to accomplish a cabin air filter change with some regular tools you probably already have. However, there are a few tools that are specific to this job that you may not have, and we also want to recommend some commonplace tools that you should definitely have in your toolbox if you do not already.

  • Screwdriver – In some cases, you will need a screwdriver to remove the cover that houses the cabin air filter.
  • A can of Compressed Air – use this to clean the area around the filter. This will help ensure that the new filter doesn’t immediately get clogged.
  • A Vacuum Cleaner / Shop Vac – You can use a handheld vacuum cleaner or shop vac instead of compressed air, but it won’t displace the the debris quite as effectively.
  • A Mask – If you have allergies or sensitivities to dust or other allergens, it is recommended to wear a mask to protect yourself when removing and replacing the cabin air filter.

2020 Kia Stinger Cabin Air Filter Replacement Guide

Why change your air filter?

You should change the cabin air filter of your 2020 Kia Stinger for several reasons:

  • Protecting the engine: A dirty or clogged air filter decreases the airflow to the engine, which can damage the engine over time.
  • Better engine performance: A clean air filter allows for a sufficient amount of air to reach the engine, which enhances overall performance and fuel efficiency.
  • Cleaner air quality inside the car: The cabin air filter helps to remove pollutants, dust, and other allergens from the air inside the car, which improves the air quality for the passengers.
  • Extending the life of the HVAC system: The cabin air filter also helps to keep the heating and air conditioning system running smoothly, which helps increase the efficiency of the system.
  • Improving the air quality outside the car: A clean air filter improves the air quality outside the car by filtering out airborne contaminants.

By changing the air filter on a regular basis, you can ensure that your Kia Stinger engine and HVAC system are running efficiently, and that the air inside and outside the car is filtered of pollutants

The correct cabin air filter for a 2020 Kia Stinger

For any 2020 Kia Stinger, you can use FRAM CF10735 cabin air filters. These will be an exact fit and will match the required specifications of your Stinger. We always try to recommend the highest quality air filters for your money, and these air filters are either a factory recommendation or an equivalent replacement available in today’s market at an affordable price.

How often should I change my cabin air filter?

Generally, it is recommended to replace the cabin air filter once per year, or every 12,500 miles, whichever comes first. If you drive in a heavily polluted area, or in an area with high levels of dust, pollen, or other allergens, consider changing the filter more frequently. Similarly, if you frequently drive on dirt or gravel roads, or if you use your 2020 Kia Stinger for off-roading, change your air filter more often.

It’s also important to pay attention to these indicators that the filter needs to be changed, such as:

  • Increased dust and debris inside the cabin
  • Reduced airflow from the vents
  • Unusual smells coming from the vents

Changing the cabin air filter on a 2020 Kia Stinger

This is a process you can do on your own with some ordinary tools. Of course, consult your owner’s manual, as well as a factory service manual (FSM). The video shown below does a good job of outlining the process.

Tips for changing the cabin air filter on a 2020 Kia Stinger

Be sure to watch the video above before you attempt to replace the air filter on your 2020 Kia Stinger, as well as review your factory service manual. Also, see the tips included below here to help you as you do this repair.

  • Follow manufacturer’s recommendations: Follow any specific instructions provided by the manufacturer, such as replacing any clips or fasteners, to ensure the proper fit of the new filter.
  • Orient the filter correctly: Make sure the new filter is installed securely, with the arrows on the filter pointing in the direction of the airflow. Incorrect installation may result in reduced filter performance and potentially damage to your car’s ventilation system.
  • Clean the area around the filter: Before installing the new filter, use a vacuum cleaner or compressed air to clean the area around the filter. This will help prevent debris from getting inside the new filter.

Helpful Tools

You should be able to accomplish a cabin air filter change with some normal tools you most likely already have. However, there are a few tools that are specific to this job that you may not have, and we also want to recommend some general tools that you should for sure have in your toolbox if you do not already.

  • Screwdriver – In some cases, you will need a screwdriver to remove the cover that houses the cabin air filter.
  • A Mask – If you have allergies or sensitivities to dust or other allergens, you should wear a mask to protect yourself when removing and replacing the cabin air filter.
  • A Vacuum Cleaner / Shop Vac – You can use a handheld vacuum cleaner or shop vac instead of compressed air, but it won’t displace the the debris quite as effectively.
  • A can of Compressed Air – use this to clean the area around the filter. This will help ensure that the new filter operates at maximum efficiency.

2016 Honda CR-V Cabin Air Filter Replacement Guide

Why change your air filter?

You should change the cabin air filter of your 2016 Honda CR-V for several reasons:

  • Protecting the engine: A dirty or clogged air filter decreases the airflow to the engine, which can damage the engine over time.
  • Enhancing the air quality inside the car: The cabin air filter helps to remove pollutants, dust, and other allergens from the air inside the car, which improves the air quality for the passengers.
  • Improved engine performance: A clean air filter allows for a greater amount of air to reach the engine, which enhances overall performance and fuel efficiency.
  • Improving the air quality outside the car: A clean air filter improves the air quality outside the car by filtering out airborne contaminants.
  • Extending the life of the HVAC system: The cabin air filter also helps to keep the heating and air conditioning system running smoothly, which helps increase the efficiency of the system.

If you replace your air filter on a regular basis, you can ensure that your Honda CR-V engine and HVAC system are running efficiently, and that the air inside and outside the car is clean and healthy.

The correct cabin air filter for a 2016 Honda CR-V

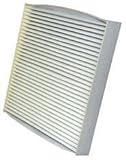
For any 2016 Honda CR-V, you can use WIX 24815 cabin air filters. These are an exact fit and will match the required specifications of your CR-V. We always try to recommend the best possible air filters for your money, and these air filters are either a factory recommendation or an equivalent replacement available in today’s market at an affordable price.

How often should I change my cabin air filter?

Generally, it is advised that you replace the cabin air filter once per year, or every 12,500 miles, whichever comes first. If you drive in a highly polluted area, or in an area with high levels of dust, pollen, or other allergens, consider changing the filter more frequently. Similarly, if you often drive on dirt or gravel roads, or if you use your 2016 Honda CR-V for off-roading, the filter may need to be changed more often.

It’s also important to pay attention to these indicators that the filter needs to be changed, including:

  • Reduced airflow from the vents
  • Increased dust and debris inside the cabin
  • Unusual smells coming from the vents

Changing the cabin air filter on a 2016 Honda CR-V

This is a process you can do on your own with some ordinary tools. Of course, consult your owner’s manual, as well as a factory service manual (FSM). The video shown below does a good job of outlining the process.

Tips for changing the cabin air filter on your 2016 Honda CR-V

Ensure you reference the video above before you attempt to replace the air filter on your 2016 Honda CR-V, as well as review your factory service manual. Be sure to check the tips shown here to help you as you do this repair.

  • Clean the area around the filter: Before installing the new filter, use a vacuum cleaner or compressed air to clean the area around the filter. This will help prevent debris from getting inside the new filter.
  • Orient the filter correctly: Make sure the new filter is installed securely, with the arrows on the filter pointing in the direction of the airflow. Improper installation may result in reduced filter performance and potentially damage to your car’s ventilation system.
  • Follow manufacturer’s recommendations: Follow any specific instructions provided by the manufacturer, such as replacing any clips or fasteners, to ensure the proper fit of the new filter.

Helpful Tools

You should be able to accomplish a cabin air filter change with some normal tools you likely already have. However, there are a few tools that are specific to this job that you may not have, and we also want to recommend some general tools that you should for sure have in your toolbox if you don’t already.

  • A Mask – If you have allergies or sensitivities to dust or other allergens, it is recommended to wear a mask to protect yourself when removing and replacing the cabin air filter.
  • Screwdriver – In some cases, you will need a screwdriver to remove the cover that houses the cabin air filter.
  • A Vacuum Cleaner / Shop Vac – You can use a handheld vacuum cleaner or shop vac instead of compressed air, but it won’t displace the the debris quite as effectively.
  • A can of Compressed Air – use this to clean the area around the filter. This will help ensure that the new filter doesn’t immediately get clogged.

2019 GMC Sierra 2500 Cabin Air Filter Replacement Guide

Why change your air filter?

It is important to change the cabin air filter of your 2019 GMC Sierra 2500 for several reasons:

  • Extending the life of the HVAC system: The cabin air filter also helps to keep the heating and air conditioning system running smoothly, which helps increase the efficiency of the system.
  • Protecting the engine: A dirty or clogged air filter decreases the airflow to the engine, which can damage the engine over time.
  • Cleaner air quality inside the car: The cabin air filter helps to remove pollutants, dust, and other allergens from the air inside the car, which improves the air quality for everyone on board.
  • Improving the air quality outside the car: A clean air filter improves the air quality outside the car by reducing the emissions of pollutants.
  • Better engine performance: A clean air filter allows for a greater amount of air to reach the engine, which enhances overall performance and fuel efficiency.

By changing the air filter on a regular basis, you can ensure that your GMC Sierra 2500 engine and HVAC system are running efficiently, and that the air inside and outside the car is clean and healthy.

The correct cabin air filter on a 2019 GMC Sierra 2500

For any 2019 GMC Sierra 2500, you can use WIX WP10129 cabin air filters. These are an exact fit and will match the required specifications of your Sierra 2500. We always try to recommend the best possible air filters for the money, and these air filters are either a factory recommendation or an equivalent replacement available in today’s market at a reasonable price.

How often should I change my cabin air filter?

Generally, it is recommended to replace the cabin air filter once per year, or every 12,500 miles, whichever comes first. If you drive in a highly polluted area, or in an area with high levels of dust, pollen, or other allergens, consider changing the filter more frequently. Similarly, if you frequently drive on dirt or gravel roads, or if you use your 2019 GMC Sierra 2500 for off-roading, change your air filter more often.

It’s also important to pay attention to these indicators that the filter needs to be changed, including:

  • Increased dust and debris inside the cabin
  • Unusual smells coming from the vents
  • Reduced airflow from the vents

Changing the cabin air filter on a 2019 GMC Sierra 2500

This is a process you should be able to do on your own with some ordinary tools. Of course, consult your owner’s manual, as well as a factory service manual (FSM). The video shown below does a good job of demonstrating the process.

Tips for changing the cabin air filter on your 2019 GMC Sierra 2500

Ensure you reference the video above before you attempt to replace the air filter on your 2019 GMC Sierra 2500, as well as review your factory service manual. Additionally, we have some tips below here to help you as you complete this repair.

  • Clean the area around the filter: Before installing the new filter, use a vacuum cleaner or compressed air to clean the area around the filter. This will help prevent debris from getting inside the new filter.
  • Orient the filter correctly: Make sure the new filter is installed securely, with the arrows on the filter pointing in the direction of the airflow. Incorrect installation may result in reduced filter performance and potentially damage to your car’s ventilation system.
  • Follow manufacturer’s recommendations: Follow any specific instructions provided by the manufacturer, such as replacing any clips or fasteners, to ensure the proper fit of the new filter.

Helpful Tools

You should be able to accomplish a cabin air filter change with some normal tools you likely already have. However, there are a few tools that are specific to this job that you may not have, and we also want to recommend some commonplace tools that you should definitely have in your toolbox if you do not already.

  • A Vacuum Cleaner / Shop Vac – You can use a handheld vacuum cleaner or shop vac instead of compressed air, but it won’t displace the the debris quite as effectively.
  • A can of Compressed Air – use this to clean the area around the filter. This will help ensure that the new filter doesn’t immediately get clogged.
  • Screwdriver – In some cases, you will need a screwdriver to remove the cover that houses the cabin air filter.
  • A Mask – If you have allergies or sensitivities to dust or other allergens, it is recommended to wear a mask to protect yourself when removing and replacing the cabin air filter.

2021 GMC Terrain Cabin Air Filter Replacement Guide

Reasons to change your air filter

It is important to change the cabin air filter of your 2021 GMC Terrain for several reasons:

  • Improving the air quality outside the car: A clean air filter can also help improve the air quality outside the car by reducing the emissions of pollutants.
  • Improved engine performance: A clean air filter allows for a greater amount of air to reach the engine, which enhances overall performance and fuel efficiency.
  • Protecting the engine: A dirty or clogged air filter decreases the airflow to the engine, which can damage the engine over time.
  • Cleaner air quality inside the car: The cabin air filter helps to remove pollutants, dust, and other allergens from the air inside the car, which improves the air quality for everyone on board.
  • Prolonging the life of the HVAC system: The cabin air filter also helps to keep the heating and air conditioning system running smoothly, which helps prolong the life of the system.

By changing the air filter on a regular basis, you can ensure that your GMC Terrain engine and HVAC system are running efficiently, and that the air inside and outside the car is clean and healthy.

The correct cabin air filter for a 2021 GMC Terrain

For any 2021 GMC Terrain, you can use WIX 24211 cabin air filters. These will be an exact fit and will match the required specifications of your Terrain. We always try to recommend the best possible air filters for the money, and these air filters are either a factory recommendation or an equivalent replacement available in today’s market at an affordable price.

How often should I change my cabin air filter?

In general, it is recommended to replace the cabin air filter once per year, or every 12,500 miles, whichever comes first. If you drive in a highly polluted area, or in an area with high levels of dust, pollen, or other allergens, consider changing the filter more frequently. Similarly, if you frequently drive on dirt or gravel roads, or if you use your 2021 GMC Terrain for off-roading, change your air filter more often.

It’s also important to pay attention to the signs that the filter needs to be changed, including:

  • Reduced airflow from the vents
  • Odd smells coming from the vents
  • Increased dust and debris inside the cabin

Changing the cabin air filter on a 2021 GMC Terrain

This is a process you should be able to do on your own with some ordinary tools. Of course, consult your owner’s manual, as well as a factory service manual. The video shown below does a good job of outlining the process.

Tips for changing the cabin air filter on your 2021 GMC Terrain

Ensure you watch the video above before you attempt to replace the air filter on your 2021 GMC Terrain, as well as review your factory service manual. Additionally, we have some tips below here to help you as you do this repair.

  • Clean the area around the filter: Before installing the new filter, use a vacuum cleaner or compressed air to clean the area around the filter. This will help prevent debris from obstructing the new filter.
  • Orient the filter correctly: Make sure the new filter is installed securely, with the arrows on the filter pointing in the direction of the airflow. Incorrect installation can lead to reduced filter performance and potentially damage to your car’s ventilation system.
  • Follow manufacturer’s recommendations: Follow any specific instructions provided by the manufacturer, such as replacing any clips or fasteners, to ensure the proper fit of the new filter.

Helpful Tools

You should be able to complete a cabin air filter change with some normal tools you probably already have. However, there are a few tools that are specific to this job that you may not have, and we also want to recommend some general tools that you should definitely have in your toolbox if you don’t already.

  • A Mask – If you have allergies or sensitivities to dust or other allergens, you should wear a mask to protect yourself when removing and replacing the cabin air filter.
  • A Vacuum Cleaner / Shop Vac – You can use a handheld vacuum cleaner or shop vac instead of compressed air, but it won’t displace the the debris quite as effectively.
  • A can of Compressed Air – use this to clean the area around the filter. This will help ensure that the new filter doesn’t immediately get clogged.
  • Screwdriver – In some cases, you will need a screwdriver to remove the cover that houses the cabin air filter.

2018 Toyota Sienna Cabin Air Filter Replacement Guide

Why change your air filter?

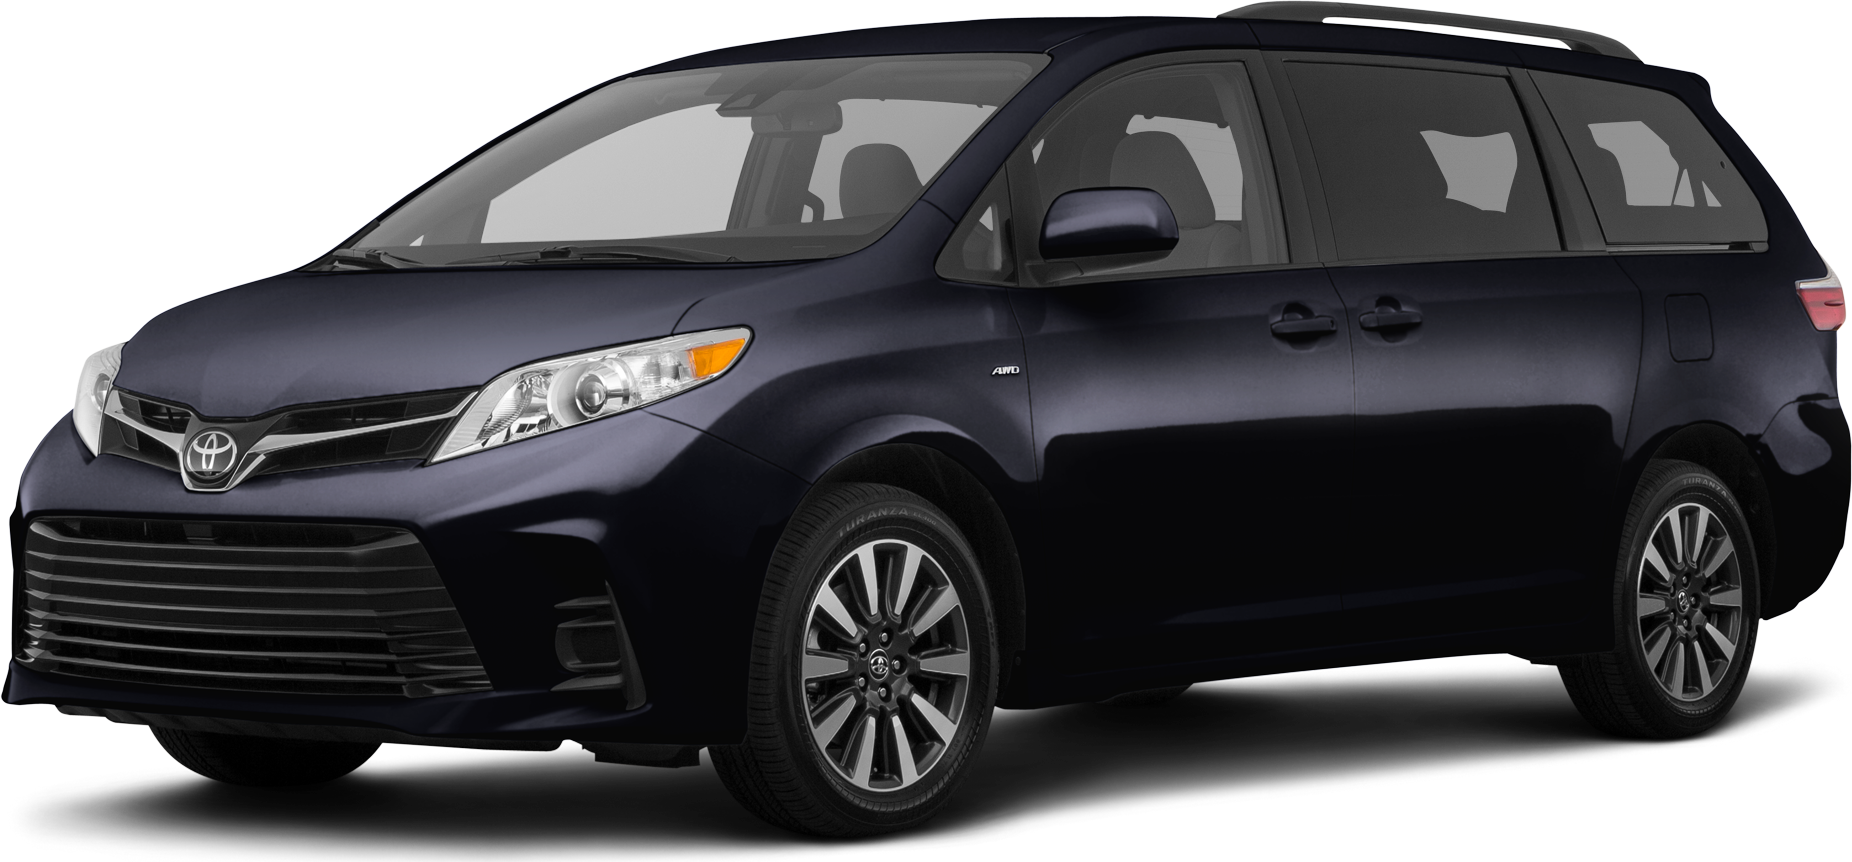
You should change the cabin air filter of your 2018 Toyota Sienna for several reasons:

  • Improved engine performance: A clean air filter allows for a greater amount of air to reach the engine, which enhances overall performance and fuel efficiency.
  • Protecting the engine: A dirty or clogged air filter decreases the airflow to the engine, which may lead to overheating and damages the engine over time.
  • Enhancing the air quality inside the car: The cabin air filter helps to remove pollutants, dust, and other allergens from the air inside the car, which improves the air quality for the passengers.
  • Prolonging the life of the HVAC system: The cabin air filter also helps to keep the heating and air conditioning system running smoothly, which helps prolong the life of the system.
  • Improving the air quality outside the car: A clean air filter can also help improve the air quality outside the car by reducing the emissions of pollutants.

By changing the air filter on a regular basis, you can ensure that your Toyota Sienna engine and HVAC system are running efficiently, and that the air inside and outside the car is filtered of pollutants

The correct cabin air filter for a 2018 Toyota Sienna

For any 2018 Toyota Sienna, you can use WIX 24483 cabin air filters. These will be an exact fit and will match the required specifications of your Sienna. We always try to recommend the best possible air filters for the money, and these air filters are either a factory recommendation or an equivalent replacement available in today’s market at an affordable price.

How often should I change my cabin air filter?

In general, it is recommended to replace the cabin air filter once per year, or every 12,500 miles, whichever comes first. If you drive in a heavily polluted area, or in an area with high levels of dust, pollen, or other allergens, it may be necessary to change the filter more frequently. Similarly, if you frequently drive on dirt or gravel roads, or if you use your 2018 Toyota Sienna for off-roading, change your air filter more often.

It’s also important to pay attention to these indicators that the filter needs to be changed, including:

  • Increased dust and debris in your car
  • Unusual smells coming from the vents
  • Reduced airflow from the vents

Changing the cabin air filter on a 2018 Toyota Sienna

This is a process you can do on your own with some ordinary tools. Of course, consult your owner’s manual, as well as a factory service manual. The video shown below does a good job of demonstrating the process.

Tips for changing the cabin air filter on your 2018 Toyota Sienna

Ensure you watch the video above before you attempt to replace the air filter on your 2018 Toyota Sienna, as well as review your factory service manual. Be sure to check the tips shown here to help you as you do this repair.

  • Clean the area around the filter: Before installing the new filter, use a vacuum cleaner or compressed air to clean the area around the filter. This will help prevent debris from obstructing the new filter.
  • Orient the filter correctly: Make sure the new filter is installed securely, with the arrows on the filter pointing in the direction of the airflow. Improper installation may result in reduced filter performance or even damage to your car’s ventilation system.
  • Follow manufacturer’s recommendations: Follow any specific instructions provided by the manufacturer, such as replacing any clips or fasteners, to ensure the proper fit of the new filter.

Helpful Tools

You should be able to accomplish a cabin air filter change with some ordinary tools you probably already have. However, there are a few tools that are specific to this job that you may not have, and we also want to recommend some general tools that you should definitely have in your toolbox if you do not already.

  • A Vacuum Cleaner / Shop Vac – You can use a handheld vacuum cleaner or shop vac instead of compressed air, but it won’t displace the the debris quite as effectively.
  • A can of Compressed Air – use this to clean the area around the filter. This will help ensure that the new filter operates at maximum efficiency.
  • A Mask – If you have allergies or sensitivities to dust or other allergens, it is recommended to wear a mask to protect yourself when removing and replacing the cabin air filter.
  • Screwdriver – In some cases, you will need a screwdriver to remove the cover that houses the cabin air filter.

2016 Cadillac Escalade Cabin Air Filter Replacement Guide

Why change your air filter?

You should change the cabin air filter of your 2016 Cadillac Escalade for several reasons:

  • Extending the life of the HVAC system: The cabin air filter also helps to keep the heating and air conditioning system running smoothly, which helps prolong the life of the system.
  • Improved engine performance: A clean air filter allows for a sufficient amount of air to reach the engine, which can improve overall performance and fuel efficiency.
  • Protecting the engine: A dirty or clogged air filter decreases the airflow to the engine, which may lead to overheating and damages the engine over time.
  • Enhancing the air quality inside the car: The cabin air filter helps to remove pollutants, dust, and other allergens from the air inside the car, which improves the air quality for the passengers.
  • Improving the air quality outside the car: A clean air filter can also help improve the air quality outside the car by filtering out airborne contaminants.

If you replace your air filter on a regular basis, you can ensure that your Cadillac Escalade engine and HVAC system are running efficiently, and that the air inside and outside the car is clean and healthy.

The correct cabin air filter on a 2016 Cadillac Escalade

For any 2016 Cadillac Escalade, you can use WIX WP10129 cabin air filters. These are an exact fit and will match the required specifications of your Escalade. We always try to recommend the highest quality air filters for your money, and these air filters are either a factory recommendation or an equivalent replacement available in today’s market at a reasonable price.

How often should I change my cabin air filter?

In general, it is advised that you replace the cabin air filter once per year, or every 12,500 miles, whichever comes first. If you drive in a heavily polluted area, or in an area with high levels of dust, pollen, or other allergens, consider changing the filter more frequently. Similarly, if you often drive on dirt or gravel roads, or if you use your 2016 Cadillac Escalade for off-roading, change your air filter more often.

It’s also important to pay attention to these indicators that the filter needs to be changed, such as:

  • Reduced airflow from the vents
  • Unusual smells coming from the vents
  • Increased dust and debris in your car

Changing the cabin air filter on a 2016 Cadillac Escalade

This is a process you can do on your own with some standard tools. Of course, consult your owner’s manual, as well as a factory service manual (FSM). The video shown below does a good job of outlining the process.

Tips for changing the cabin air filter on your 2016 Cadillac Escalade

Please make sure you watch the video above before you attempt to replace the air filter on your 2016 Cadillac Escalade, as well as review your factory service manual. Additionally, we have some tips below here to help you as you do this repair.

  • Clean the area around the filter: Before installing the new filter, use a vacuum cleaner or compressed air to clean the area around the filter. This will help prevent debris from obstructing the new filter.
  • Orient the filter correctly: Make sure the new filter is installed securely, with the arrows on the filter pointing in the direction of the airflow. Improper installation may result in reduced filter performance and potentially damage to your car’s ventilation system.
  • Follow manufacturer’s recommendations: Follow any specific instructions provided by the manufacturer, such as replacing any clips or fasteners, to ensure the proper fit of the new filter.

Helpful Tools

You should be able to accomplish a cabin air filter change with some normal tools you most likely already have. However, there are a few tools that are specific to this job that you may not have, and we also want to recommend some commonplace tools that you should definitely have in your toolbox if you don’t already.

  • A can of Compressed Air – use this to clean the area around the filter. This will help ensure that the new filter operates at maximum efficiency.
  • A Mask – If you have allergies or sensitivities to dust or other allergens, you should wear a mask to protect yourself when removing and replacing the cabin air filter.
  • Screwdriver – In some cases, you will need a screwdriver to remove the cover that houses the cabin air filter.
  • A Vacuum Cleaner / Shop Vac – You can use a handheld vacuum cleaner or shop vac instead of compressed air, but it won’t displace the the debris quite as effectively.

2022 Kia Telluride Cabin Air Filter Replacement Guide

Why change your air filter?

It is important to change the cabin air filter of your 2022 Kia Telluride for several reasons:

  • Prolonging the life of the HVAC system: The cabin air filter also helps to keep the heating and air conditioning system running smoothly, which helps prolong the life of the system.
  • Protecting the engine: A dirty or clogged air filter can restrict the airflow to the engine, which may lead to overheating and damages the engine over time.
  • Enhancing the air quality inside the car: The cabin air filter helps to remove pollutants, dust, and other allergens from the air inside the car, which improves the air quality for the passengers.
  • Improving the air quality outside the car: A clean air filter can also help improve the air quality outside the car by reducing the emissions of pollutants.
  • Improved engine performance: A clean air filter allows for a sufficient amount of air to reach the engine, which can improve overall performance and fuel efficiency.

By changing the air filter on a regular basis, you can ensure that your Kia Telluride engine and HVAC system are running efficiently, and that the air inside and outside the car is clean and healthy.

The correct cabin air filter for a 2022 Kia Telluride

For any 2022 Kia Telluride, you can use FRAM CF10735 cabin air filters. These will be an exact fit and will match the required specifications of your Telluride. We always try to recommend the best possible air filters for the money, and these air filters are either a factory recommendation or an equivalent replacement available in today’s market at an affordable price.

How often should I change my cabin air filter?

In general, it is recommended to replace the cabin air filter once per year, or every 12,500 miles, whichever comes first. If you drive in a highly polluted area, or in an area with high levels of dust, pollen, or other allergens, consider changing the filter more frequently. Similarly, if you often drive on dirt or gravel roads, or if you use your 2022 Kia Telluride for off-roading, the filter may need to be changed more often.

It’s also important to pay attention to the signs that the filter needs to be changed, including:

  • Reduced airflow from the vents
  • Unusual smells coming from the vents
  • Increased dust and debris inside the cabin

Changing the cabin air filter on a 2022 Kia Telluride

This is a process you can do on your own with some commonplace tools. Of course, consult your owner’s manual, as well as a factory service manual. The video shown below does a good job of outlining the process.

Tips for changing the cabin air filter on a 2022 Kia Telluride

Please make sure you review the video above before you attempt to replace the air filter on your 2022 Kia Telluride, as well as review your factory service manual. Be sure to check the tips shown here to help you as you complete this repair.

  • Follow manufacturer’s recommendations: Follow any specific instructions provided by the manufacturer, such as replacing any clips or fasteners, to ensure the proper fit of the new filter.
  • Orient the filter correctly: Make sure the new filter is installed securely, with the arrows on the filter pointing in the direction of the airflow. Incorrect installation may result in reduced filter performance and potentially damage to your car’s ventilation system.
  • Clean the area around the filter: Before installing the new filter, use a vacuum cleaner or compressed air to clean the area around the filter. This will help prevent debris from obstructing the new filter.

Helpful Tools

You should be able to complete a cabin air filter change with some normal tools you probably already have. However, there are a few tools that are specific to this job that you may not have, and we also want to recommend some general tools that you should for sure have in your toolbox if you do not already.

  • A Mask – If you have allergies or sensitivities to dust or other allergens, you should wear a mask to protect yourself when removing and replacing the cabin air filter.
  • A Vacuum Cleaner / Shop Vac – You can use a handheld vacuum cleaner or shop vac instead of compressed air, but it won’t displace the the debris quite as effectively.
  • A can of Compressed Air – use this to clean the area around the filter. This will help ensure that the new filter doesn’t immediately get clogged.
  • Screwdriver – In some cases, you will need a screwdriver to remove the cover that houses the cabin air filter.

2021 Nissan Sentra Cabin Air Filter Replacement Guide

Why change your air filter?

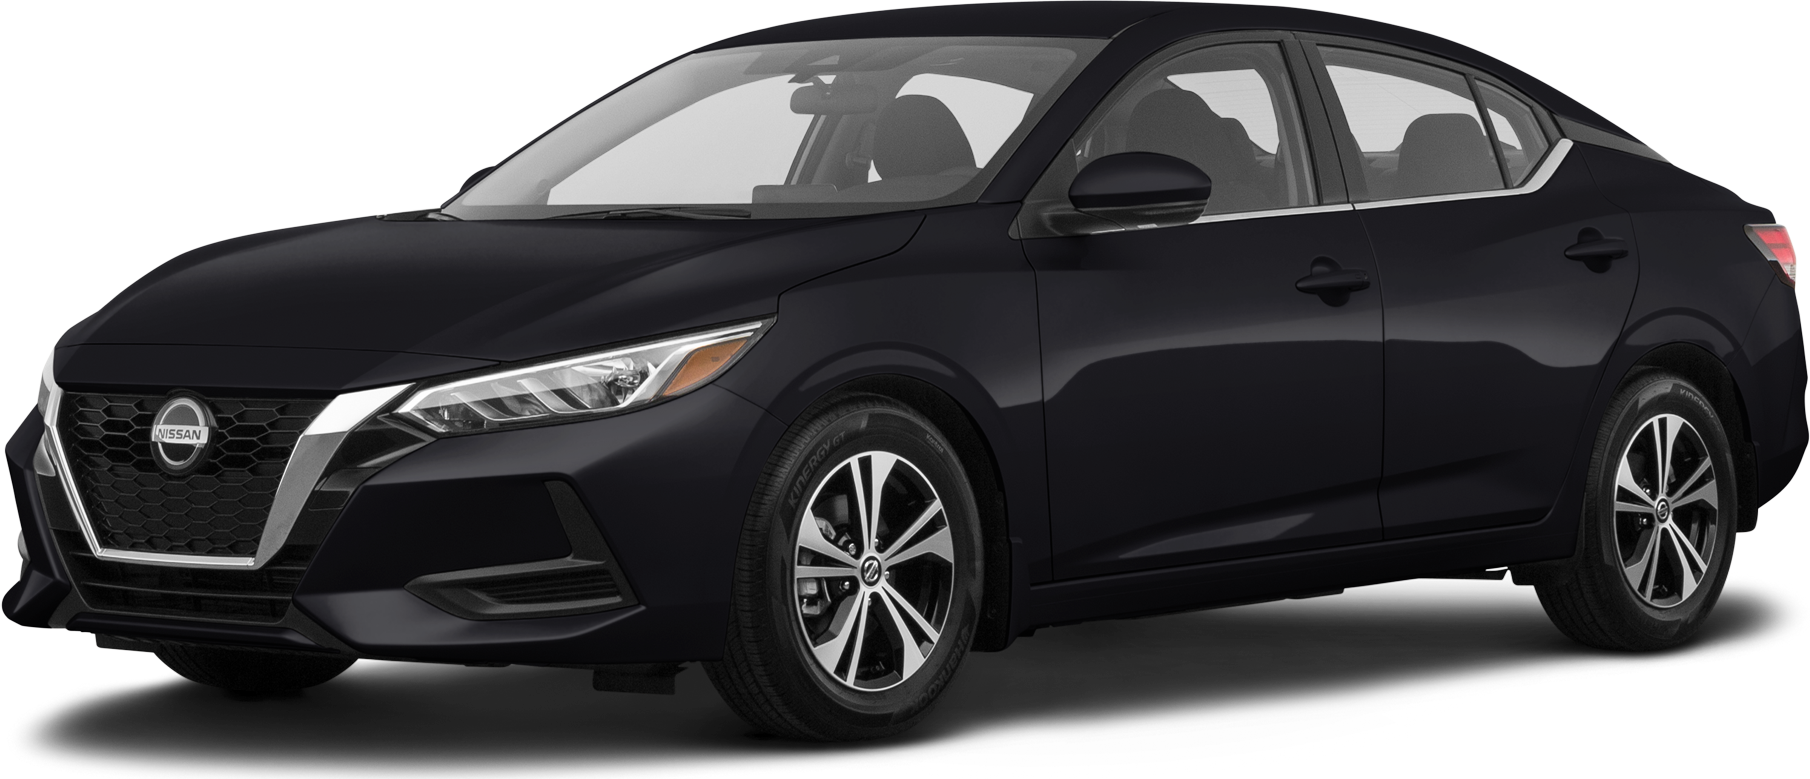
It is important to change the cabin air filter of your 2021 Nissan Sentra for several reasons:

  • Improving the air quality outside the car: A clean air filter can also help improve the air quality outside the car by filtering out airborne contaminants.
  • Extending the life of the HVAC system: The cabin air filter also helps to keep the heating and air conditioning system running smoothly, which helps prolong the life of the system.
  • Enhancing the air quality inside the car: The cabin air filter helps to remove pollutants, dust, and other allergens from the air inside the car, which improves the air quality for the passengers.
  • Protecting the engine: A dirty or clogged air filter can restrict the airflow to the engine, which can damage the engine over time.
  • Improved engine performance: A clean air filter allows for a greater amount of air to reach the engine, which enhances overall performance and fuel efficiency.

If you replace your air filter on a regular basis, you can ensure that your Nissan Sentra engine and HVAC system are running efficiently, and that the air inside and outside the car is filtered of pollutants

The correct cabin air filter for a 2021 Nissan Sentra

For any 2021 Nissan Sentra, you can use ACDELCO CF3147 cabin air filters. These are an exact fit and will match the required specifications of your Sentra. We always try to recommend the best possible air filters for your money, and these air filters are either a factory recommendation or an equivalent replacement available in today’s market at a reasonable price.

How often should I change my cabin air filter?

Generally, it is advised that you replace the cabin air filter once per year, or every 12,500 miles, whichever comes first. If you drive in a highly polluted area, or in an area with high levels of dust, pollen, or other allergens, it may be necessary to change the filter more frequently. Similarly, if you frequently drive on dirt or gravel roads, or if you use your 2021 Nissan Sentra for off-roading, change your air filter more often.

It’s also important to pay attention to the signs that the filter needs to be changed, such as:

  • Increased dust and debris in your car
  • Odd smells coming from the vents
  • Reduced airflow from the vents

Changing the cabin air filter on a 2021 Nissan Sentra

This is a process you should be able to do on your own with some ordinary tools. Of course, consult your owner’s manual, as well as a factory service manual. The video shown below does a good job of demonstrating the process.

Tips for changing the cabin air filter on your 2021 Nissan Sentra

Ensure you watch the video above before you attempt to replace the air filter on your 2021 Nissan Sentra, as well as review your factory service manual. Also, see the tips included below here to help you as you do this repair.

  • Follow manufacturer’s recommendations: Follow any specific instructions provided by the manufacturer, such as replacing any clips or fasteners, to ensure the proper fit of the new filter.
  • Orient the filter correctly: Make sure the new filter is installed securely, with the arrows on the filter pointing in the direction of the airflow. Improper installation may result in reduced filter performance or even damage to your car’s ventilation system.
  • Clean the area around the filter: Before installing the new filter, use a vacuum cleaner or compressed air to clean the area around the filter. This will help prevent debris from getting inside the new filter.

Helpful Tools

You should be able to complete a cabin air filter change with some normal tools you probably already have. However, there are a few tools that are specific to this job that you may not have, and we also want to recommend some general tools that you should absolutely have in your toolbox if you do not already.

  • A Mask – If you have allergies or sensitivities to dust or other allergens, it is recommended to wear a mask to protect yourself when removing and replacing the cabin air filter.
  • A can of Compressed Air – use this to clean the area around the filter. This will help ensure that the new filter operates at maximum efficiency.
  • A Vacuum Cleaner / Shop Vac – You can use a handheld vacuum cleaner or shop vac instead of compressed air, but it won’t displace the the debris quite as effectively.
  • Screwdriver – In some cases, you will need a screwdriver to remove the cover that houses the cabin air filter.

2018 Toyota Land Cruiser Cabin Air Filter Replacement Guide

Why change your air filter?

You should change the cabin air filter of your 2018 Toyota Land Cruiser for several reasons:

  • Improving the air quality outside the car: A clean air filter improves the air quality outside the car by filtering out airborne contaminants.
  • Cleaner air quality inside the car: The cabin air filter helps to remove pollutants, dust, and other allergens from the air inside the car, which improves the air quality for the passengers.
  • Better engine performance: A clean air filter allows for a greater amount of air to reach the engine, which can improve overall performance and fuel efficiency.
  • Protecting the engine: A dirty or clogged air filter can restrict the airflow to the engine, which may lead to overheating and damages the engine over time.
  • Prolonging the life of the HVAC system: The cabin air filter also helps to keep the heating and air conditioning system running smoothly, which helps increase the efficiency of the system.

If you replace your air filter on a regular basis, you can ensure that your Toyota Land Cruiser engine and HVAC system are running efficiently, and that the air inside and outside the car is clean and healthy.

The correct cabin air filter on a 2018 Toyota Land Cruiser

For any 2018 Toyota Land Cruiser, you can use WIX 24483 cabin air filters. These will be an exact fit and will match the required specifications of your Land Cruiser. We always try to recommend the highest quality air filters for your money, and these air filters are either a factory recommendation or an equivalent replacement available in today’s market at an affordable price.

How often should I change my cabin air filter?

Generally, it is recommended to replace the cabin air filter once per year, or every 12,500 miles, whichever comes first. If you drive in a heavily polluted area, or in an area with high levels of dust, pollen, or other allergens, consider changing the filter more frequently. Similarly, if you often drive on dirt or gravel roads, or if you use your 2018 Toyota Land Cruiser for off-roading, change your air filter more often.

It’s also important to pay attention to the signs that the filter needs to be changed, including:

  • Reduced airflow from the vents
  • Unusual smells coming from the vents
  • Increased dust and debris inside the cabin

Changing the cabin air filter on a 2018 Toyota Land Cruiser

This is a process you should be able to do on your own with some standard tools. Of course, consult your owner’s manual, as well as a factory service manual (FSM). The video shown below does a good job of demonstrating the process.

Tips for changing the cabin air filter on a 2018 Toyota Land Cruiser

Ensure you review the video above before you attempt to replace the air filter on your 2018 Toyota Land Cruiser, as well as review your factory service manual. Additionally, we have some tips below here to help you as you do this repair.

  • Clean the area around the filter: Before installing the new filter, use a vacuum cleaner or compressed air to clean the area around the filter. This will help prevent debris from obstructing the new filter.
  • Orient the filter correctly: Make sure the new filter is installed securely, with the arrows on the filter pointing in the direction of the airflow. Incorrect installation can lead to reduced filter performance and potentially damage to your car’s ventilation system.
  • Follow manufacturer’s recommendations: Follow any specific instructions provided by the manufacturer, such as replacing any clips or fasteners, to ensure the proper fit of the new filter.

Helpful Tools

You should be able to complete a cabin air filter change with some regular tools you likely already have. However, there are a few tools that are specific to this job that you may not have, and we also want to recommend some commonplace tools that you should definitely have in your toolbox if you do not already.

  • A can of Compressed Air – use this to clean the area around the filter. This will help ensure that the new filter doesn’t immediately get clogged.
  • Screwdriver – In some cases, you will need a screwdriver to remove the cover that houses the cabin air filter.
  • A Vacuum Cleaner / Shop Vac – You can use a handheld vacuum cleaner or shop vac instead of compressed air, but it won’t displace the the debris quite as effectively.
  • A Mask – If you have allergies or sensitivities to dust or other allergens, it is recommended to wear a mask to protect yourself when removing and replacing the cabin air filter.